


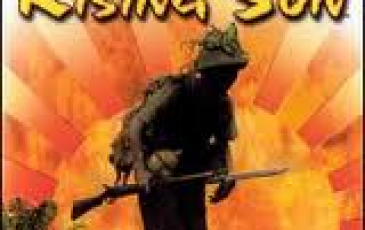
First Clash at Kohima - The Matrix Games version of Rising Sun
 0 - 1 - 16

| Rating: | 4.79 (12) |
| Games Played: | 17 |
| SM: | 2 |
| Turns: | 16 |
| Type: | Stock |
| First Side: | Allies |
| Second Side: | Axis |
Village of Kohima, 95km N of Imphal, India: [Best played as Allied] The Japanese offensive - Operation U-Go - propelled General Mutaguchi's 15th Army into India in what turned out to be turning point of the War in South East Asia. One of the critical objectives of this attack was the mountain village of Kohima. This isolated hamlet sits in a mountain pass astride the only all-weather road between Imphal, the key to defending Eastern India, and the railhead at Dimapur. Control of this pass and the village would sever the supply line to all British forces on the Imphal plain and position the Japanese forces for the invasion of India proper! The British realized the importance of the area but underestimated the value Mutaguchi had placed on this objective, they expected a regiment, the Japanese sent a division. This scenario represents the first stage of what turned out to be an epic struggle lasting three weeks and comprising some of the most ferocious fighting of the war. Kohima was the seat of the British Deputy Commissioner in India and his residence became a pivotal position on this small battlefield, at one point British and Japanese soldiers lobed grenades across the adjoining tennis courts for five days, fighting for positions mere feet apart. The village was a key logistics hub as many of the place names show: G.P.T. Ridge (General Purpose Transport), F.S.D. Hill (Field Supply Depot), D.I.S. spur (Depot Inspection Station) and Hospital Spur (53rd Indian General Hospital - I.G.H.). The defenders consisted of a hodge-podge collection of rear area troops, training units and soldiers on convalescence leave; British, Indian, Napalies, Burmies & Gurka, all under command of Col Hugh Richards. At the last moment, an under-strength battalion of British regulars, the 4th Royal West Kent was rushed forward in time to solidify the defence and in turn become surrounded with the remainder of the garrison. The Japanese 58th Regt of the 31st Division had very simple orders: Take Kohima!
| Player Voting Stats | ||
|---|---|---|
| Member | Balance | Enjoyment |
 Blitz Shadow Player Blitz Shadow Player |
Moderately Pro Allies | 6 |
 Wüstenlöwe Wüstenlöwe |
Moderately Pro Allies | 3 |
 Nikanor Nikanor |
Slightly Pro Allies | 8 |
 Stripes Stripes |
Moderately Pro Allies | 5 |
| Totally Pro Axis | 2 | |
| Gaming Records | |||||||||
|---|---|---|---|---|---|---|---|---|---|
| 1st Side Player | 2nd Side Player | Result | Score | ||||||
|
 |
Herr Straße Laufer | vs. | Ashcloud |  |
|
Axis Major Victory | 24 | 4 |
|
 |
Scud | vs. | Scaz |  |
|
Axis Major Victory | 24 | 4 |
|
 |
Tank Killer | vs. | Hughen Tanken de Tote |  |
|
Axis Major Victory | 24 | 4 |
|
 |
Jeepster777 | vs. | Yossarian |  |
|
Axis Major Victory | 24 | 4 |
|
 |
RADO | vs. | Antoni Chmielowski |  |
|
Allies Minor Loss | 8 | 18 |

Good looking map but...rather hard for the allies to win in this scenario with the IJA artillery pounding them to death.


Allies have the numbers, but not the teeth. They disrupt and/or run away most of the time. Japanese artillery is very effective. Not a great scenario for PBEM.
Resolve then, that on this very ground, with small flags waving and tinny blasts on tiny trumpets, we shall meet the enemy, and not only may he be ours, he may be us. --Walt Kelly


If played against a human opponent EA should be turned on. It's a tough one for the Allied side.
“The past was erased, the erasure was forgotten, the lie became the truth.”― George Orwell (1984)


)