


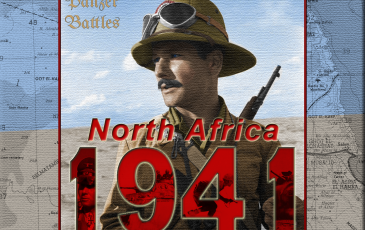
#410426_01v Corinth Canal - Fallschirmjaeger Attack - North Africa 1941
 4 - 1 - 2

| Rating: | 7.43 (10) |
| Games Played: | 7 |
| SM: | 1 |
| Turns: | 10 |
| Type: | Stock |
| First Side: | Axis (NA41) |
| Second Side: | Allied (NA41) |
r of the Greek 2nd Army on April 20th, it was clear that Greece could not be saved and the Allied expeditionary force (W Force) would have to be evacuated quickly or annihilated. To that end, General Wilson, ordered the embarkation of as many troops as possible from southern Greek ports. The Germans realizing this decided to capture the single bridge over Corinth Canal in the hope of trapping any units that had not crossed already into the Peloponnesus. Generalleutnant Karl Student proposed his Fallschirmjäger could take the bridge quickly and once agreed that Oberst Alfred Sturm's Fallschirmjäger-Regt 2 lead the assault. Defending the canal was Isthmus Force a motley collection of Allied units, expecting an assault from the land, not the air.
 Fhil
Fhil Wolfgang
 Green
Green Geier
Geier Wyvern666
| Gaming Records | |||||||||
|---|---|---|---|---|---|---|---|---|---|
| 1st Side Player | 2nd Side Player | Result | Score | ||||||
|
Gris | vs. | gambler1650 |  |
|
Allied (NA41) Minor Victory | 9 | 3 | |
|
 |
Bioman | vs. | LordDeadwood |  |
|
Axis (NA41) Minor Victory | 9 | 3 |
|
Gris | vs. | gambler1650 | |
|
Axis (NA41) Major Victory | 12 | 2 | |
|
 |
Wyvern666 | vs. | WildReign |  |
|
Axis (NA41) Minor loss | 3 | 9 |
|
 |
Outlaw Josey Wales | vs. | Geier |  |
|
Axis (NA41) Minor Victory | 9 | 3 |


This is a tough one for the Germans - they have a lot of objectives to attain and a fairly tight time restriction. Knowing how and when to balance your forces is key in this one.


Allies largely have fixed low quality units and very limited to no chance to hold any of the key objectives


There is enough historical confusion about the actual battle regarding OOB’s, dispositions, and even certain events (like the circumstances around how the canal bridge was destroyed), that it is best to approach this scenario the same way as watching a Hollywood war movie that is “based” on actual events. Loosely. An example is the amount of AAA that was actually at the bridge. Sources say anything from “several,” to one 40mm that had to be spiked and abandoned, to “none at all.” So, just play it and have fun, and don’t sweat the results too much.

This scenario was not bad. It was trying to recreate an actual battle and I think a couple of the allied units may have been larger in size than they should have been. Hard to say for sure as details are somewhat sketchy as to the actual size of units out there in the available media. Also the German Engineer Company that glided in first was actually split and landed safely near both sides of the main bridge crossing the canal. This is not reflected in the game, probably for play balance purposes I guess.


It's an interesting scenario with the variability due to the paradrops. It was a bit frustrating for me as the Allies because there was one whole formation that I never was able to get into the battle (probably at least 2 turns away at the end of the game) and another that only arrived in firing distance on the last turn. Still, I like the low counter density and uncertain nature of the battle.

Good game, not a whole lot for the Allies to do in this one except hope to hold off the Germans long enough to reduce their VP total. Allied fire is very ineffectual.
A lot depends on the locations of the drops, but there are a variety of different ways to go as the Axis. Definitely more interesting to play as the Axis.


)