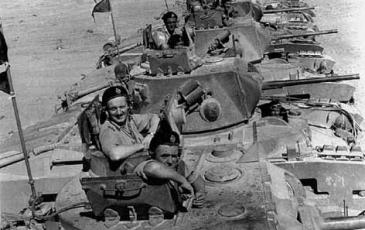
#29 - Battle of Alam Hamza (15-16 December 1941)_Alt - PzC 04 Tobruk '41

 0 - 0 - 0

| Rating: | 0 (0) |
| Games Played: | 0 |
| SM: | 2 |
| Turns: | 14 |
| Type: | Custom |
| First Side: | British |
| Second Side: | Axis |
Gazala, 15 December 1941: The first stop on Rommel's retreat out of Cyrenaica was the old Italian positions at Gazala. The halt was necessary to allow time for the evacuation of the rear area elements but also for the reorganization of the Italians as it seemed that a repeat of December 1940 was in the making. Already, the Italians had started surrendering in droves and in one instance on 12 December, the Maori battalion captured over 1100 Italians at a loss of only 16 of their own. But Rommel still had a large mass of infantry and a potent cadre of panzer troops. Against the Gazala position, the British launched their pursuit forces, significantly limited by their supply services which were still based on depots back near the Egyptian border. The Battle for the Alam Hamza ridge at the southern end of the Gazala defenses started on 13 December with the Indian Division attacking from the south. Point 204 was captured by the 1st Buffs but German counterattacks to the south near Sidi Breghisc threatened to encircle them. Closer to the coast, the 5th New Zealand Brigade advanced straddling the escarpment but they could make no headway against the Italians. By 15 December, the British had moved up additional units in the south consisting of all the spare Infantry Tanks while in the north, the New Zealanders were joined by the Polish Brigade. Add to this a wide flanking move by the remainder of the 4th Armoured Brigade and the stage is set for the final chapter in the Crusader Battles. NOTE: the British artillery in this scenario is a mess of cross attachments and, because of the Brigade System, most have no spotters. It is recommended that this scenario be played with the "Indirect Fire and Air Strikes by the Map" optional rule. Edited by: Edward "Volcano Man" Williams. PDT and OOB files slightly altered to reflect small scale tactical desert warfare of the period. [Size: medium, Length: 14 turns]


