• Blitz Shadow Player
  • Caius
  • redboot
  • Rules
  • Chain of Command
  • Members
  • Supported Ladders & Games
  • Downloads

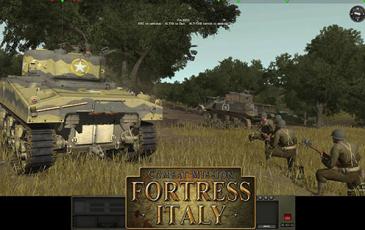
Biazzo Ridge - Combat Mission: Fortress Italy

Biazzo Ridge Image
Combat Mission x2 Ladder

Biazzo Ridge

By Jon Martina
Allies 2 - 1 - 5 Axis
Rating: 8.41 (8)
Games Played: 8
SM: 9
Turns: 180
Type: Custom
First Side: Allies
Second Side: Axis
Colonel Gavin assaults Biazzo Ridge while on its way to Gela.
Player Voting Stats
Member Balance Enjoyment
Fusilier9's ProfileFusilier9 Well Balanced 7
Stonecutter's ProfileStonecutter Well Balanced 8
ChappyCanuck's ProfileChappyCanuck Well Balanced 7
ChappyCanuck's ProfileChappyCanuck Well Balanced 8
Duff's ProfileDuff Well Balanced 8
Stonecutter
Major General
Stonecutter Thu Apr 19, 2018 10:05 pm
This is a big, long, infantry battle on a massive map that goes through three phases. A key challenge for the Germans is using green troops vs mostly regular US troops - a neat twist! At the start, the US builds up and has superior numbers. Later, more German infantry arrives until they have superior numbers. At the end, the Germans get a troop of Tigers and the US side gets a half dozen Shermans (no upgunned, just regular). The 60mm mortars were ridiculous in this battle and wiped out well over half the initial German force within the first 20 minutes. Luckily for me, we never got to check out how well the Shermans would brew up when facing Tigers :-)
ChappyCanuck
Warrant Officer
ChappyCanuck Thu Apr 19, 2018 10:27 pm
I love large maps...being channeled is no fun. Beware of the US 60mm ghost mortars...just when you think you are hidden behind a wall in an orchard, the 60's always somehow find their mark. A good balance of forces...and lots and lots of green troops!
ChappyCanuck
Warrant Officer
ChappyCanuck Frid Nov 23, 2018 3:41 am
A huge force of Germans - all Green. Yikes. As the German player you really need to take this into account. Your soldiers do not fire very accurately and they break easily. Your Tiger tanks will be hit with rifle grenades and decide to bail out and be slaughtered - kinda like a battleship being hit by a rowboat and then the battleship crew decides to jump overboard. So beware and play accordingly. This scenario takes a long time to get going, but once all of the forces are on board it gets nasty really quick. A fun battle!
Duff
1st Lieutenant
Duff Sun Feb 24, 2019 5:37 pm
A nice big map with plenty of space and time for both sides to maneuver. Lots of interesting tactical choices to make. Late-arriving armor on both sides shakes things up entertainingly.
BletchleyGeek
Staff Sergeant
BletchleyGeek Tue May 21, 2019 12:15 pm
Very interesting game. The Axis player has a definite advantage towards the second half, but it is no cake walk to use that advantage effectively. The experience differential between the US paras and the German grenadiers is quite significant, less so with some of the 130th IR reinforcements (?).

In our game a1steaks was very very close to completely break through my flanks. The German reinforcements arrived just in the nick of time.

The German armor is historical but certainly the US needs more AT assets. A TD platoon would have probably come in handy for my opponent. In this game a1steaks was very aggressive with his armor - he used to effectively roll up some of my advancing infantry - but that meant that I got wind of where his armor was and work out an ambush to knock out half of it. The other half stood its ground, short range Sherman - Tiger duels are fun. a1steaks came close to disable one of the Tigers.

This has been one of the hardest fought games of CMx2 I remember. Thanks for the game a1steaks and to theblitz.club for organising this.