Scenario 03, Turn 4
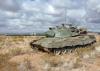
I suspect I am getting close to where the Egyptian frontline is, so I will be creeping forward a hex or two at a time until I can break into the rear. Here is the situation at the start of the turn.
![[Image: SuezLCG_Scen03_Turn04_001.PNG]](http://www.pethocarto.com/download/aar_images/lcg/SuezLCG_Scen03_Turn04_001.PNG)
As mentioned, I advanced slowly, leading with infantry to hopefully spot the Egyptians in the dunes. I have plotted artillery for next turn at suspected positions.
![[Image: SuezLCG_Scen03_Turn04_002.PNG]](http://www.pethocarto.com/download/aar_images/lcg/SuezLCG_Scen03_Turn04_002.PNG)
The 2D overview of the situation. The highlighted units are my Core battalion.
![[Image: SuezLCG_Scen03_Turn04_003.PNG]](http://www.pethocarto.com/download/aar_images/lcg/SuezLCG_Scen03_Turn04_003.PNG)
As suspected, the non-core infantry has taken some initial fire from the Eygptians positions, causing a reduction and retreat.
![[Image: SuezLCG_Scen03_Turn04_004.PNG]](http://www.pethocarto.com/download/aar_images/lcg/SuezLCG_Scen03_Turn04_004.PNG)
The Egyptian fire continues and continues to disrupt the infantry probe.
![[Image: SuezLCG_Scen03_Turn04_005.PNG]](http://www.pethocarto.com/download/aar_images/lcg/SuezLCG_Scen03_Turn04_005.PNG)
A Sho't Kal is destroyed by a missile. The Sagger team is still hidden.


 Archived Forums
 Help
Help Calendar
 Member List
 Search


![[Image: SuezLCG_Scen03_Turn04_006.PNG]](http://www.pethocarto.com/download/aar_images/lcg/SuezLCG_Scen03_Turn04_006.PNG)


)


